Start with your original image open in GIMP.
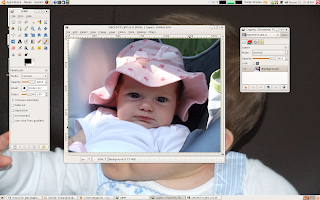 Use the ellipse tool (on the top row second from the left) to choose the iris (colored part) of the first eye.
 Hold down the shift key and click to add the second eye to the selection. To adjust the circle on the second eye let go of the shift key and make sure you choose one of the corner boxes to move. Otherwise you will make a second ellipse on that eye. This may take a few times to get right until you are used to doing it.
 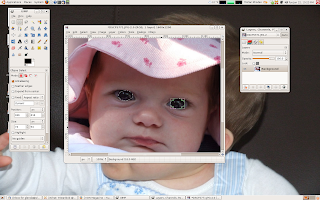 After you have both eye selected, copy your selection. You can do this by clicking Ctrl +C or by going to the edit menu and choosing copy.
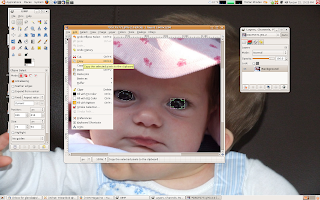 Create a new layer to paste your selection (the two eyeballs) into. This is done by clicking on the new layer button at the bottom left of the layer box. The default parameters are fine, click "ok"
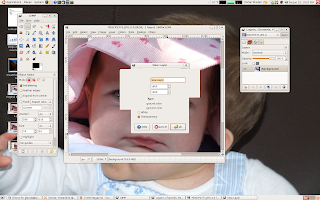 Once your new layer is created, select "Paste Into" on the edit menu.
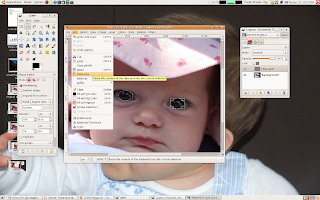 This will place a copy of your eyeballs onto the new layer. If you look in the layer box, you will see they are still listed as a floating selection. Anchor the eyes into the new layer by clicking on the anchor button at the bottom of the layer box.
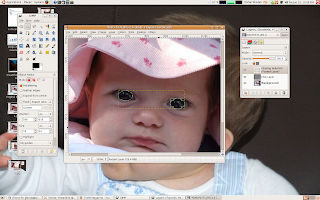 To see what this new layer looks like, I turned off the background layer. You can do this by clicking on the eye next to the layer name. I also renamed my layer to eye 1.
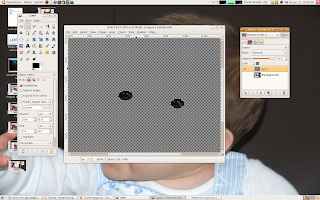 Run an unsharp mask on your eye layer. This is located under Filters>Enhance>Unsharp Mask
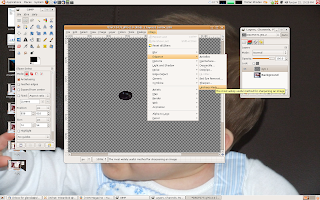 The unsharp mask dialog box will open. I used values of 8/1/0. The GIMP unsharp mask is different than a Photoshop unsharp mask in that the "Amount" is not listed as a %. Click "OK' to close the box.
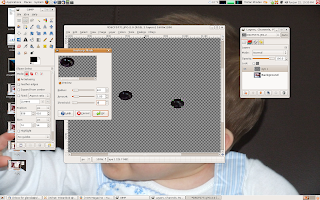 Create a duplicate of your sharpened eye later by clicking on the duplicate layer box at the bottom of the layer dialog box. You can also create a duplicate layer by going to Layer>Duplicate Layer.
Change the top eye layer to "Soft Light" in the drop down menu on the layer dialog box.
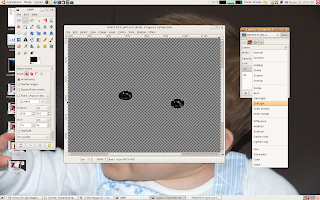 Here is the final product! If you are working with lighter eyes you may want to adjust the opacity (probably of the middle layer) until it looks the way you want it.
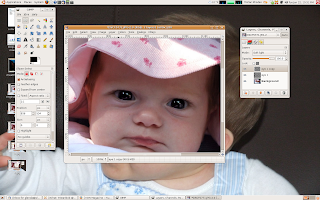 And the original again just for comparison
13 comments:
Hi there. I came across your tutorials while doing a search for "gimp fix for closed eyes". You do an excellent job in breaking things down to something that makes sense. I hope you continue to post in 2009. Thanks & Happy Thanksgiving!
great tutorial! it helped me :) a lot
This helped me SO much! I'm so glad I found this, my son has amazing eyes yet when I take a picture it seems like something is missing, thanks for helping me make them bright again!!
Thank you! Your site rocks!
Thanks a ton for this tutorial!! I am totally loving learning how to use GIMP so thanks again for the help!
Thank you very much for your tutorial. I gave it a try and the result was great! Another simple way to improve a photo with Gimp. I kinda love this freeware now!!
Thanks again and have a nice day!
This was very easy and so much fun to do, thank you for sharing and taking the time to do this!
Amazing tutorial!
I found this one when I was searching 'enhance eyes gimp' on google.
What a great tutorial!!!
Keep blogging!!!
Thank you!!!
Thank you very, very much! easy to follow!
Amazing…what an awesome blog! You have a way with words and how I wish I can write like you. I am starting my freelance career as a blogger on all topics under the sun. Is there a niche for writers like me who want to write on everything and anything? I found some really cool sites like Business Logo Design, Professional photo design jobs that are the best platform for beginners like me…and of course, for the professionals. What are your thoughts on e-Marketplaces?
The Free Online Photo Editor, as its name implies, offers a way to quickly edit photos that you have on your hard drive and save them as a finished file.
Some of the effects you can do with this program include Red Eye Removal, Sepia, Enhance, Sharpen, and Polaroid Effect.It is simple to use and doesn’t do some things that the higher end programs do, but it’s a great simple solution for quick fixes if you need to save or upload and enhance a photo quickly and easily.One added plus with the Free Online Photo Editor is that you can hit the “order” button and order a canvas print of the photo that you created if you would like a physical copy of it.
website: https://www.cincopa.com/blog/the-best-online-photo-editing-tools/
Keyword: photo editing blogs
Paint.net is (at least in our opinion) the simplest option on the list. It still comes with a ton of powerful features like layers, adjustments, and user-created plugins, but is simple enough that complete newcomers can grasp it immediately. The features are across the top, and filters are accessible from a drop-down menu. Some of the special effects are pretty cool: sharpen, blur, distort, emboss, etc. You can even get some Instagram-esque vintage effects in there for good measure. We don’t want to waste too much time on this one. It’s got a lot of features, an easy interface, and a simple layout. If you’re struggling with others on this list, then stick with the easiest option.
Post a Comment